Saturday, July 29, 2006

Sand Socks


It's a craft! It's a sport! It's ... sand socks! This is a fun activity for beach or sand box. Take odd socks. Fill with sand. Tie tops with rubber bands. Draw faces on socks. Then play bean bag games -- toss; hunt; sort; etc.

Invented by Hannah, age 9. Designedby Hannah and Izzy, Lucy, and Eliot, age 6.

Friday, July 28, 2006

Generation T


Generation Tby Brooklyn craftista Megan Nicolay is the best of several new books inviting readers to cut, stitch, tie, and pin old t-shirts into gritty new fashions. Megan’s projects involve very few tools and include several no-sew recipes. The book is aimed at single young women, but many projects appeal to the under-12 crowd. My 6-year old daughter Lucy loved melding two years of camp t-shirts into a shizoid hybrid. And the counselors were wowed, too! Indeed, I think summer camp, with its regulation shirts, topsy-turvy dress codes, and low-brow crafting, forms a preteen layer in the DIY t-shirt craze. S'mores, anyone?

To make the shirt: find two shirts of equal size. Go for contrasting colors or funny juxtapositions. Cut both shirts in half. Stitch halves together. If you want, cut off the sleeves and then add complementary ties to the shoulders using scraps from the sleeves.

Saturday, July 22, 2006

Altered Purses


When is a scrap book not a scrap book? When it's a purse.

This project takes a long time, but it's nice for long summer days when you can let the different stages dry outside. We got the idea from Violette's Folk Art.

1. Find an old purse with a smooth surface -- vinyl or leather.
2. Sand. Cover with gesso (a white acrylic base). You may have to do one side at a time and let each one dry.
3. Paint with another coat of acrylic in a color you like. (We chose orange.)
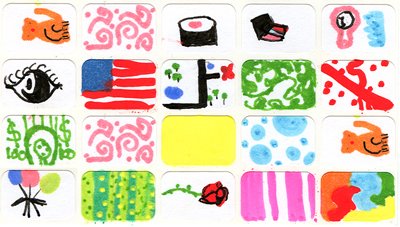
4. When the purse is dry, add layers of imagery.

Possibilities include: fabric squares (from fabric scraps or pieces of clothing you can't wear anymore); colored paper; images from magazines, books, the internet, or clipart; simple stickers such as reinforcer rings and office dots. Black and white engravings stand out against a colorful collage background. We added some ribbons on top once we had our images layed out. These delivered a set of clean connecting lines to the busy layers beneath.

For gluing: put a generous layer of ModPodge or another decoupage glue on the surface of the purse. Add your paper or fabric elements, and then put more glue medium on top. The extra glue helps your pieces stick to the purse, and also seal it.

Note: Some items may be less colorfast than others. The funky look of this project, though, is pretty forgiving.

Purse designed by Hannah, age 9.

Friday, July 21, 2006

Door hangers


White foam door hangers (50 cents each at your local craft mart) are easily decorated with materials on hand. The finished hangers invite visitors into your space, or ward them off. Draw directly with Sharpies [1]; add stickers to create Office Buddies and Eyeball Monsters [2], or use colored clipart [3].

Designs by Hannah, age 9 and Eliot, age 6.

Thursday, July 20, 2006

Sticker Art


Use a sheet of tiny "price tag" stickers to make itty bitty works of art. Each one is a frame for a different picture. You'll find yourself drawing different kinds of art, just because the space you're working on is different. Draw animals, sushi, flags, abstract shapes, or anything else you like. Keep your stickers together, or put them on letters, packages, stationery, or your notebook. Stickers by Ruby, age 7

Monday, July 17, 2006

Coin box


This coin box is great for saving your spare change, or collecting money for charity.

We made the trompe l'oeil coin pattern with our scanner. Lay pennies face down on the scanner, positioning them gently so you don't scratch the glass. Place colored paper behind it. Scan, print, and use for wrapping paper. We chose a cereal bar box. The reclose tabs made a great coin slot. We opened up the side of the box, and used a velcro strip for opening and closing. We glued the paper on the box, scored it with skinny orange masking tape, and then added some plastic bugs at the end to ward against early withdrawal.

Great box for Halloween coin collectors .... UNICEF, here we come!

Friday, July 07, 2006

Cup Cozies


These fuzzy party decorations were made with scraps of fleece left over from another project. We used a Starbucks cardboard cup insulator as a template, and created cozy sleeves for each cup. (We took it apart, laid it flat, and traced it as a pattern for the cup sleeve.) Then, the kids glued on eyes, ears, ribbons, and other stuff to make cuddly characters. (Hot glue worked great on the fleece, forming a very tough bond.) Keep your chocolate warm and your heart happy!

Wednesday, July 05, 2006

American Graffiti


This Fourth of July, we put out an old white table cloth and a box of red, white, and blue Sharpies (plus black, and silver) on an outside table. Guests could write whatever they wanted, from names and doodles to their political opinions. By the end of the night, spilled drinks had mingled with mixed sentiments, re-composing the evening.

Grafitti = Writing as Drawing


Twelve little monkeys, in three straight lines,
Put writing behind them, and call it Design.

Art by Ronnie, age 9.